Minimum Setup • For WordPress on Windows • Clear Interface

Launch local WordPress projects in seconds.

WPronto gives you a fast, lightweight and fully configured WordPress development environment for Windows — without bloated control panels, complicated setup or endless configuration.

WPronto rocket logo
Completely free
Lightweight and fast
WordPress-focused workflow
Multiple projects support

System requirements

Windows 10 / 11 (64-bit)

8GB RAM (16GB recommended)

700MB free space + projects

What's inside

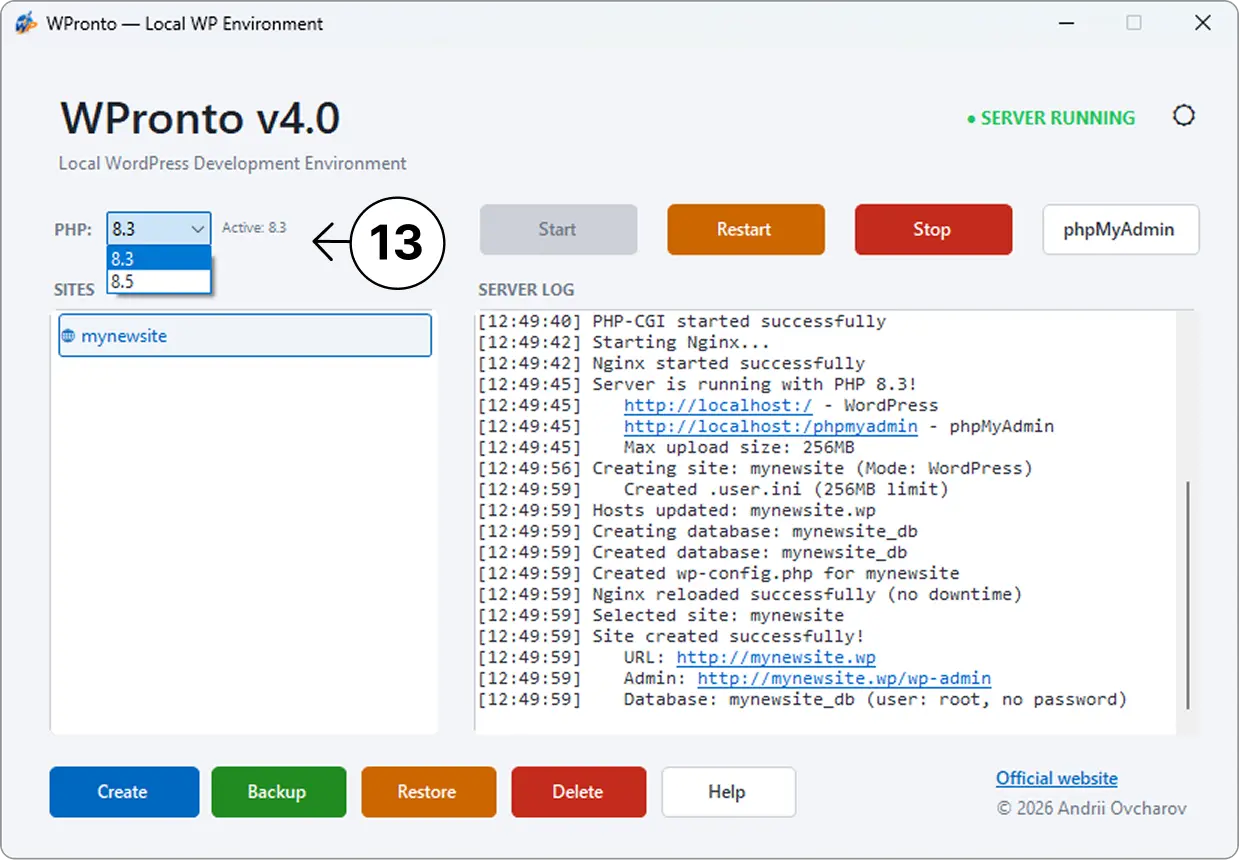
Nginx 1.30 PHP 8.3/8.5 MariaDB 10.11 WordPress 7.0 phpMyAdmin 5.2
All software is pre-configured and ready to use right after installation.

Made for WordPress developers

Start everything instantly

Launch Nginx, PHP and MariaDB with one click. No terminal commands, no confusing setup, no wasted time.

Create WordPress sites automatically

WPronto configures databases, local domains and WordPress files for you — so you can focus on development instead of server setup.

Multiple projects support

Create multiple WordPress projects and switch between them effortlessly. Each project has its own database, local domain, and settings — all organized in one place.

Full Site Backup

One-click backup creates a complete copy of your site files AND database. All backups are stored in organized folders by site and date.

One-click project removal

Delete unused projects instantly — no manual folder hunting or config cleanup required.

Hotkeys Support

Control the server without touching the mouse: Ctrl+S to start, Ctrl+X to stop. Your workflow just got faster.

Clean local domains

Every project gets its own readable local domain like myproject.wp automatically.

Built-in phpMyAdmin & WP-CLI

Manage databases with phpMyAdmin or control WordPress via command line using WP-CLI.

Secure credential storage

Master password protected vault stores all your WordPress admin credentials securely.

Get started in minutes

1

Install WPronto

Download and install WPronto on your Windows computer in just a few clicks.

2

Create a new project

Enter your project name and let WPronto automatically configure the entire WordPress environment for you.

3

Start building immediately

Open your local WordPress site, log into the admin dashboard and continue developing normally.

Step-by-step guide

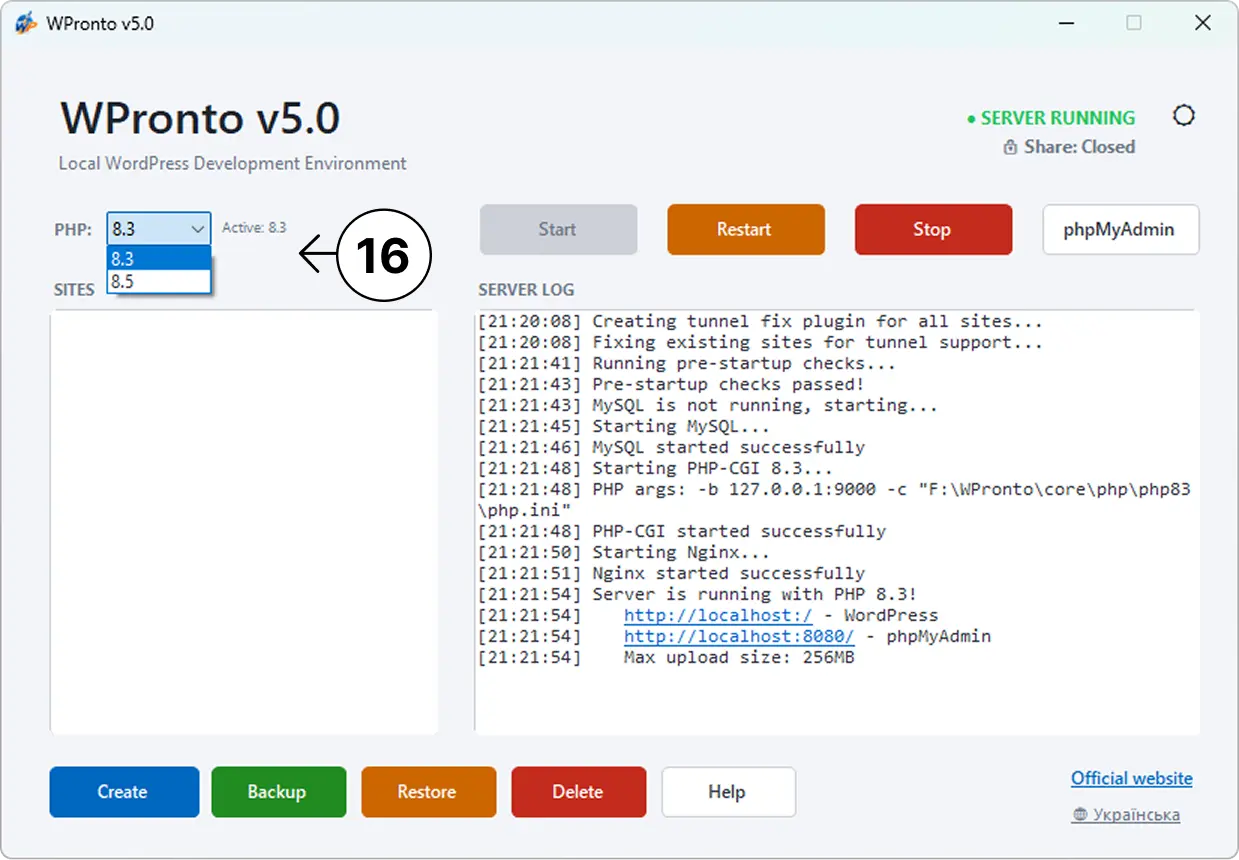
Starting server

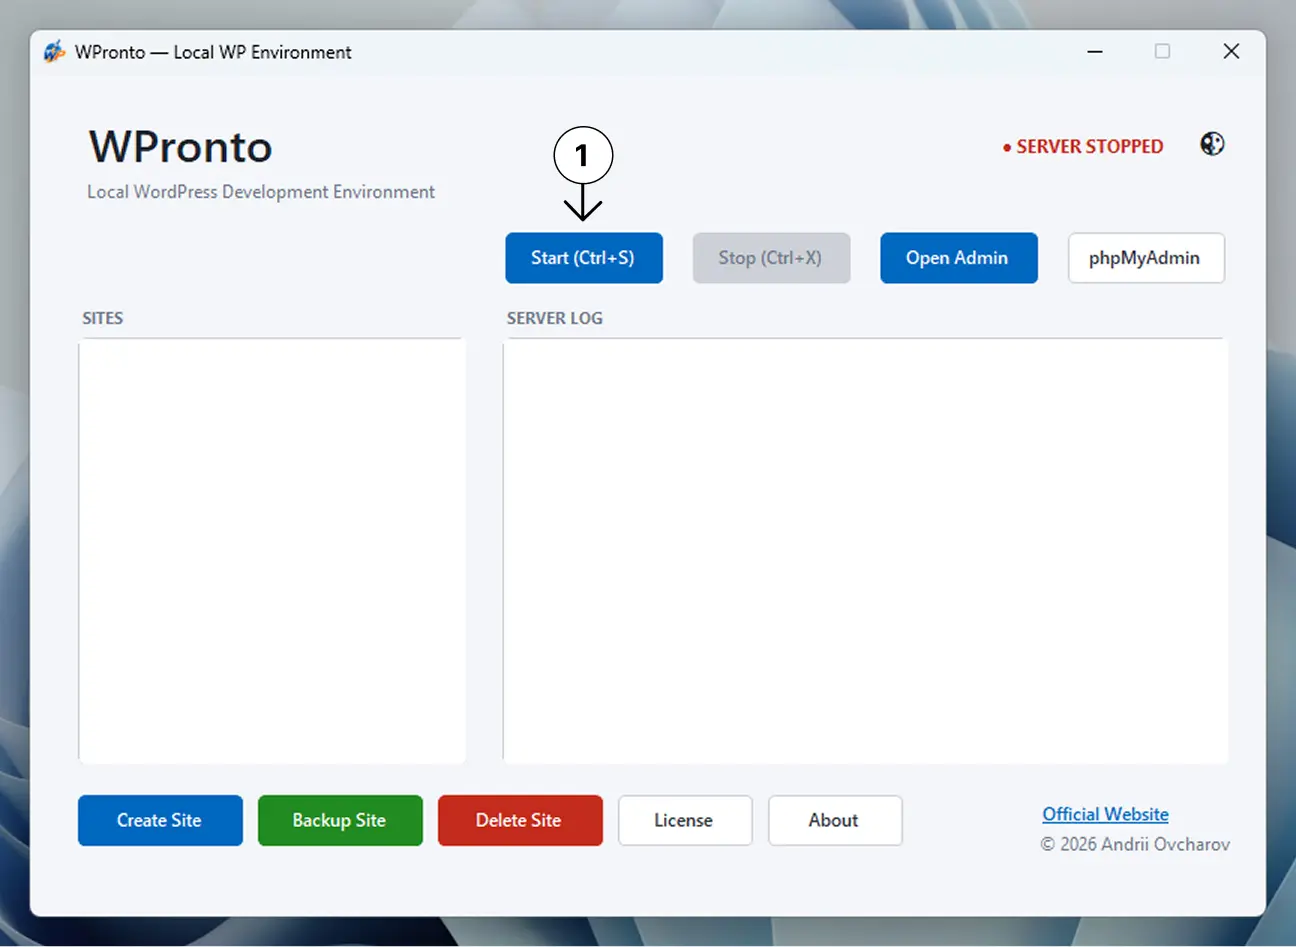
Step 1 — Start the local server

Press "Start" (or Ctrl+S) and WPronto will automatically launch Nginx, PHP and MariaDB. Your local development environment becomes ready in seconds. The server status will change from red (Stopped) to green (Running).
Create site

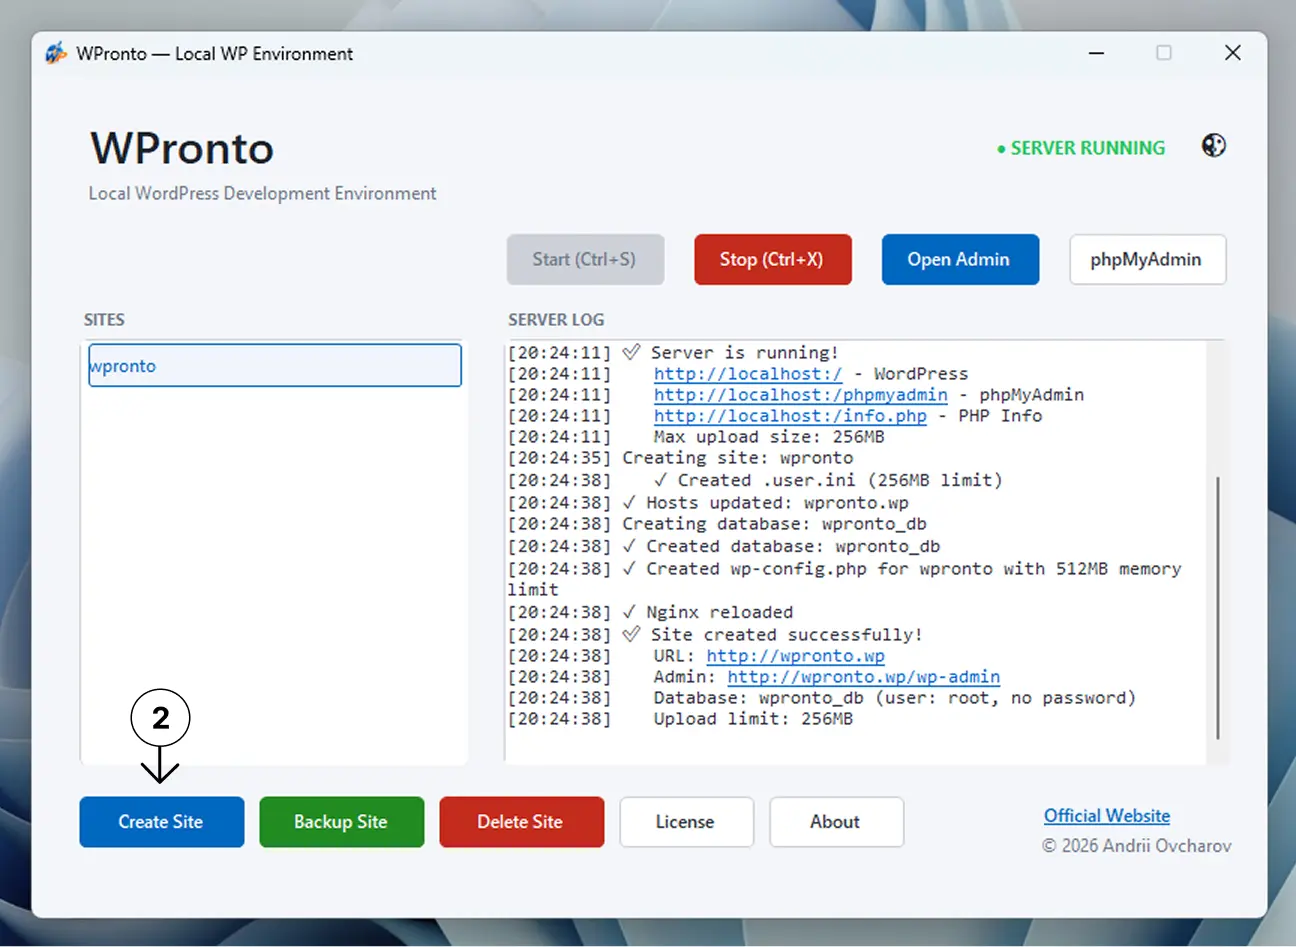
Step 2 — Create a new site

Press "Create Site" to begin a new WordPress project. Enter a project name (use underscores for multi-word names, like best_store). WPronto will automatically create the database and configure the local domain.

WordPress installation

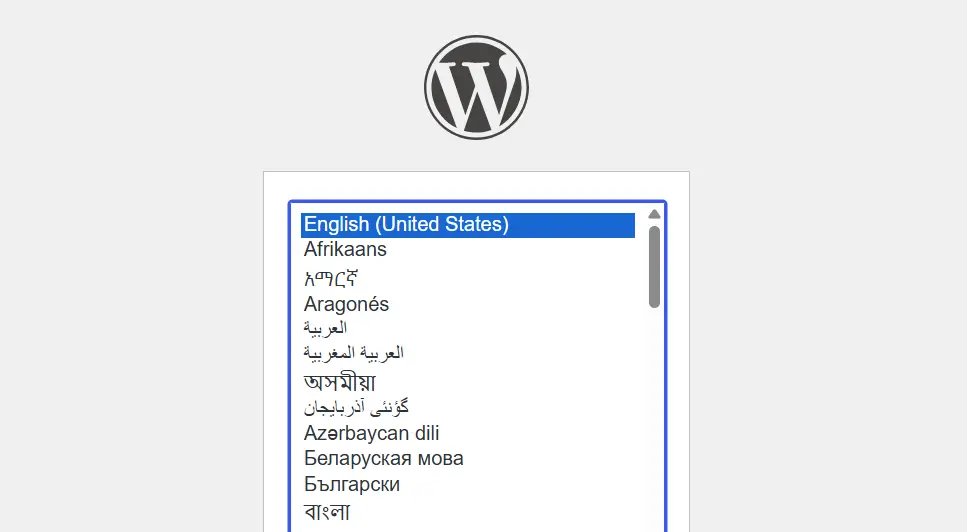
Step 3 — Install WordPress

After site creation, click "Open Admin" or open http://your-site.wp/wp-admin/install.php in your browser. Follow the WordPress installation wizard — choose your language, enter site title, username, password, and email.

Open admin dashboard

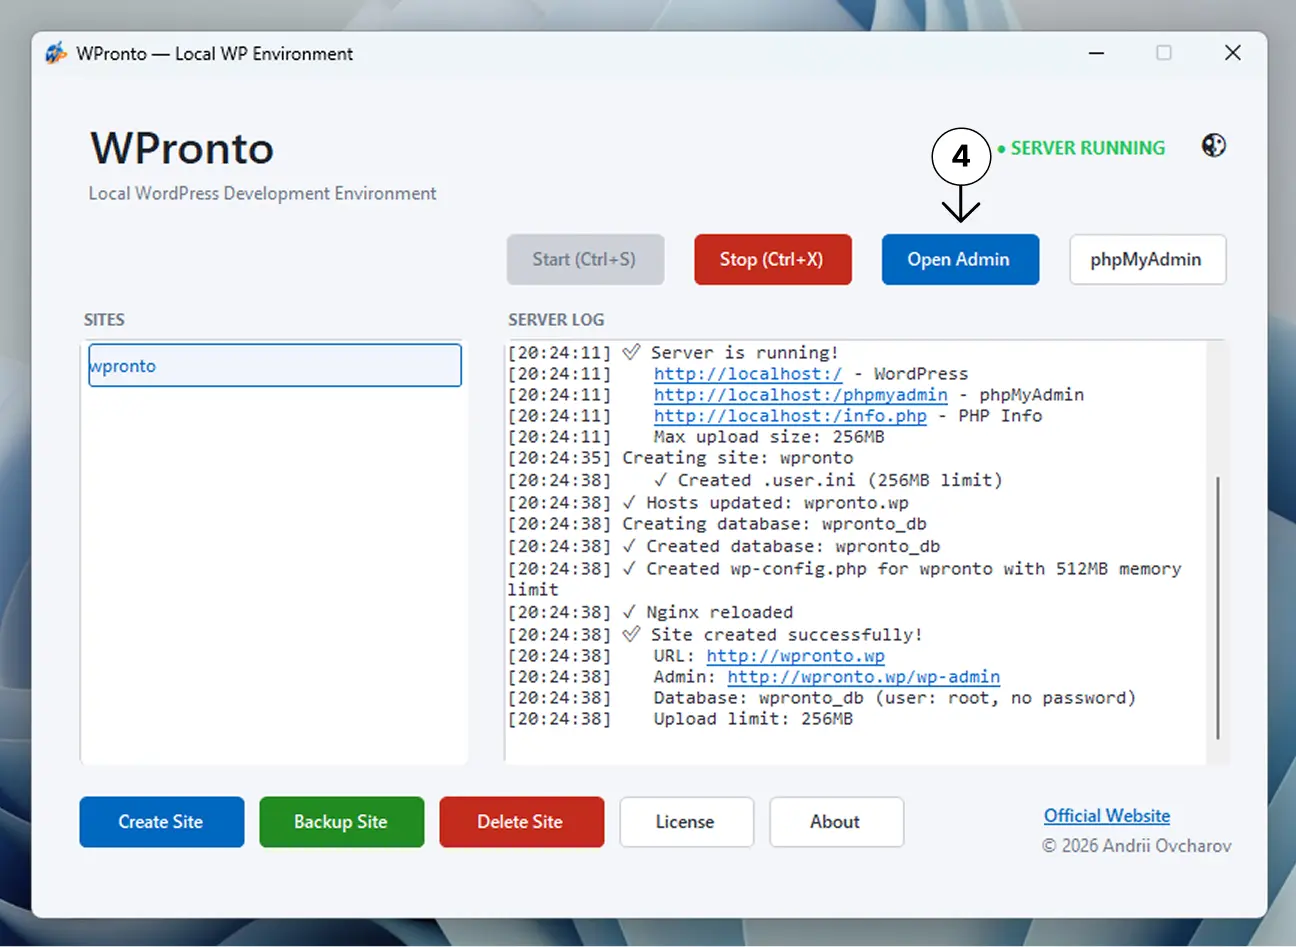
Step 4 — Open the admin dashboard

After installation, press "Open Admin" to instantly access your WordPress dashboard and start developing.

Manage database

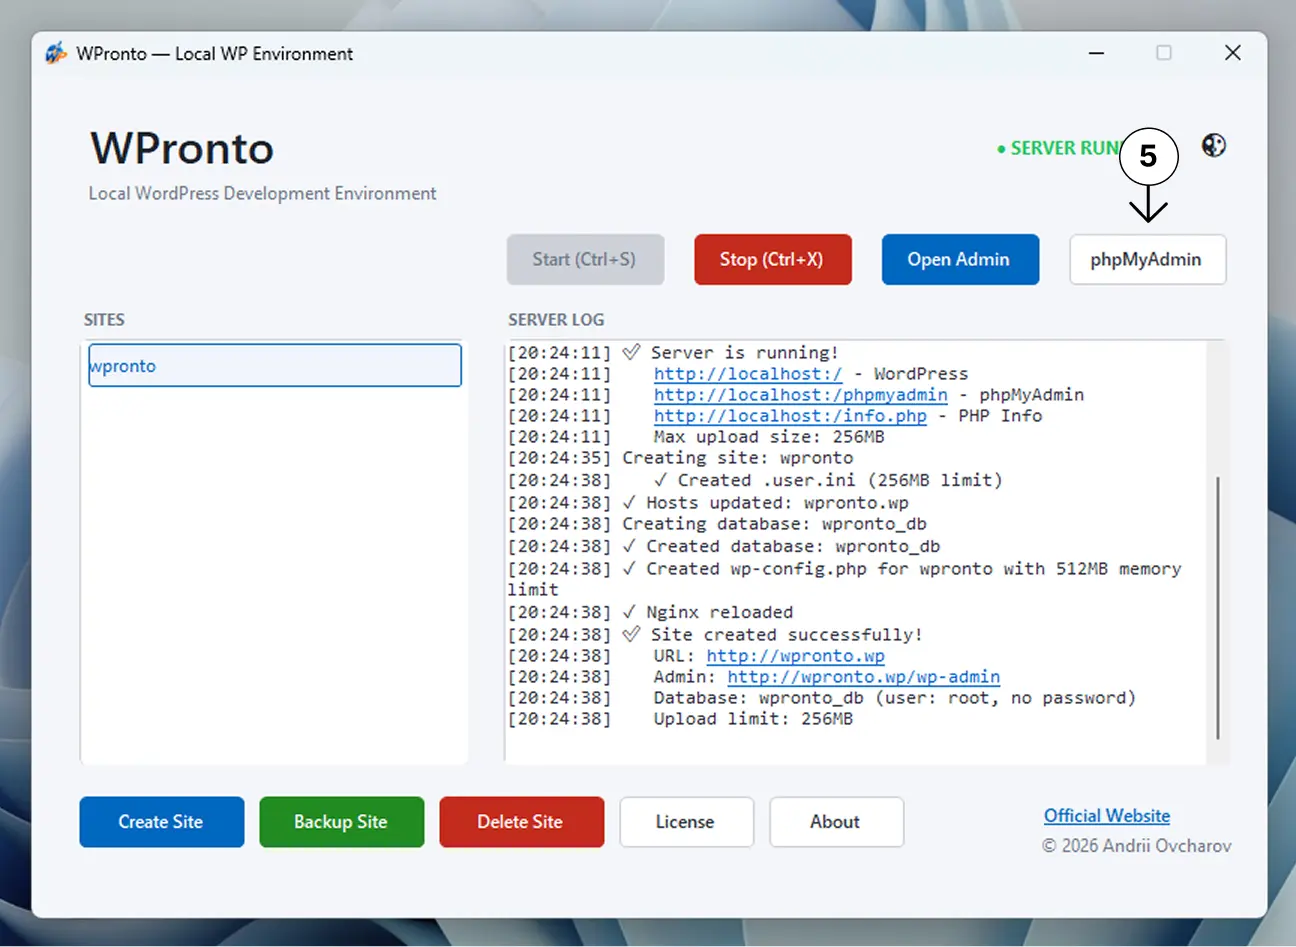
Step 5 — Manage your database

Open phpMyAdmin anytime to browse tables, run SQL queries or debug your project.


Default database credentials:
Username: root
Password: (empty)

Backup site

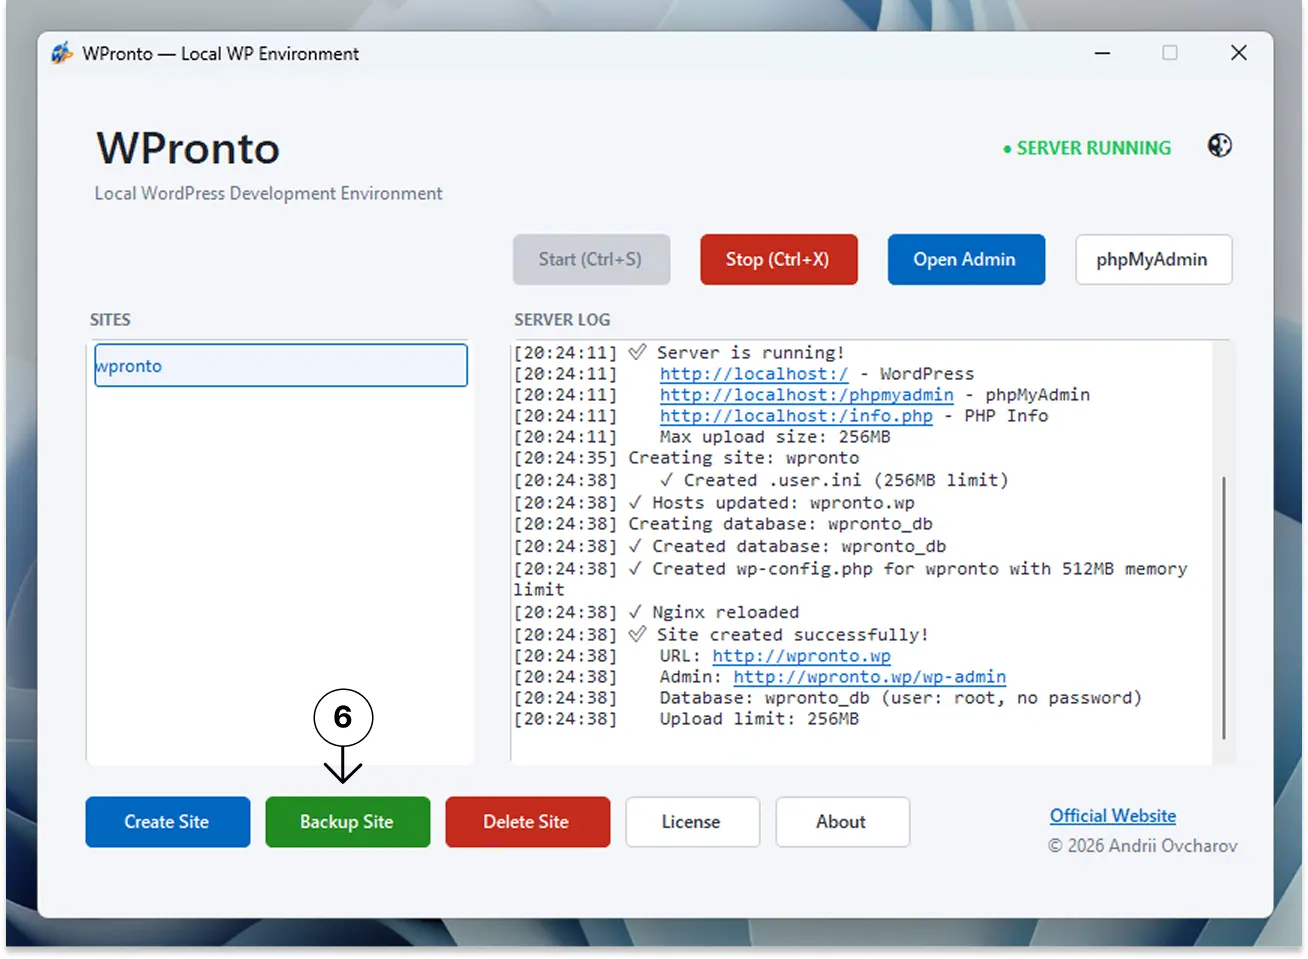
Step 6 — Create a backup

Select a site and click "Backup Site" to create a full backup (files + database). Backups are saved to: WPronto/backups/your-site/YYYY-MM-DD_HH-MM-SS/


How to restore a backup:

  1. Create a new site with the EXACT same name
  2. Copy files from backups/.../files/ to www/your-site/
  3. Import the SQL file via phpMyAdmin
  4. Restart the server (Stop → Start)
Stop server

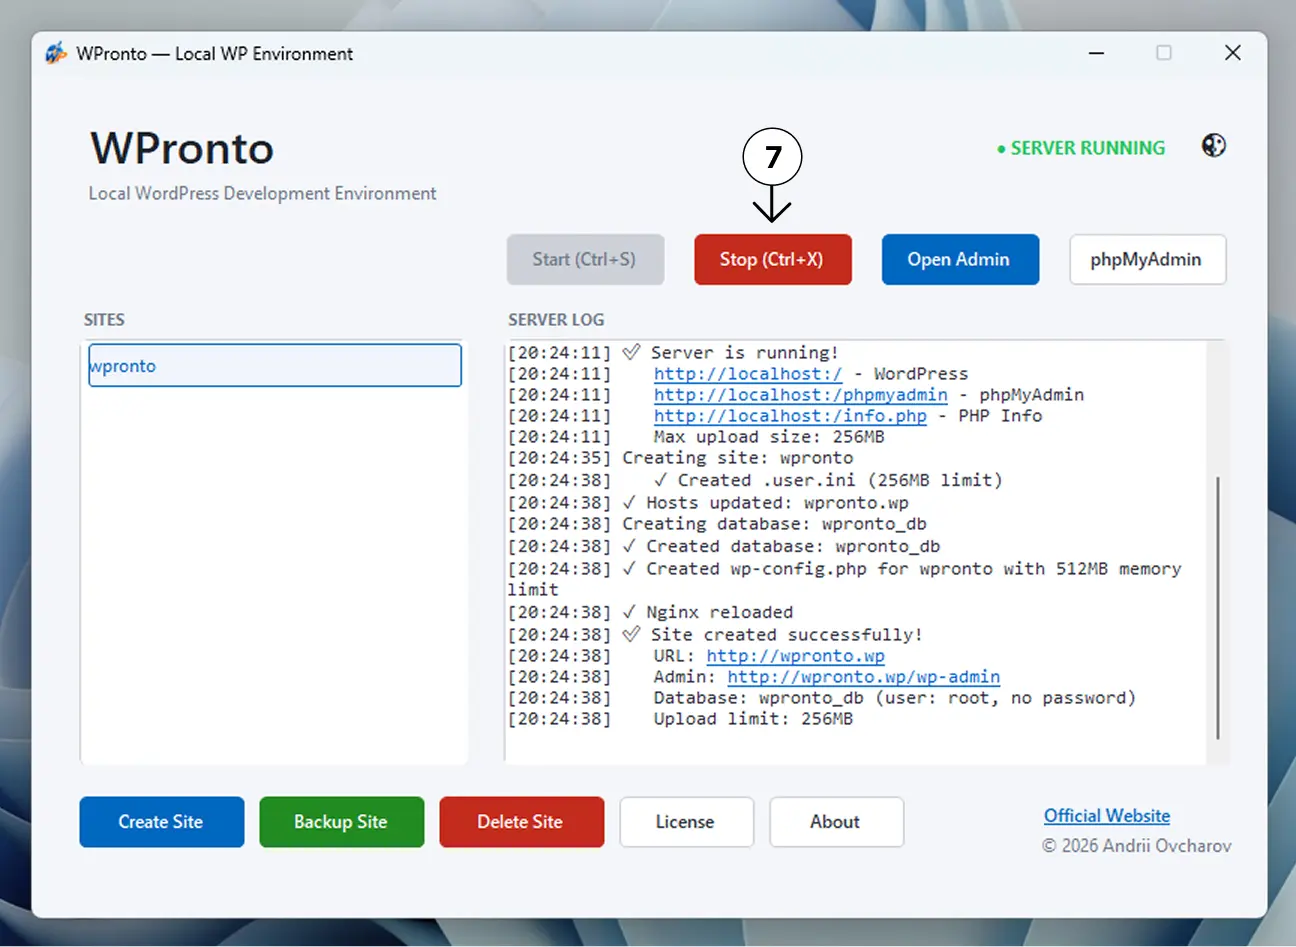
Step 7 — Stop the environment anytime

Press "Stop" (or Ctrl+X) to pause the local server. Your projects, databases and settings remain saved between sessions.

Delete site

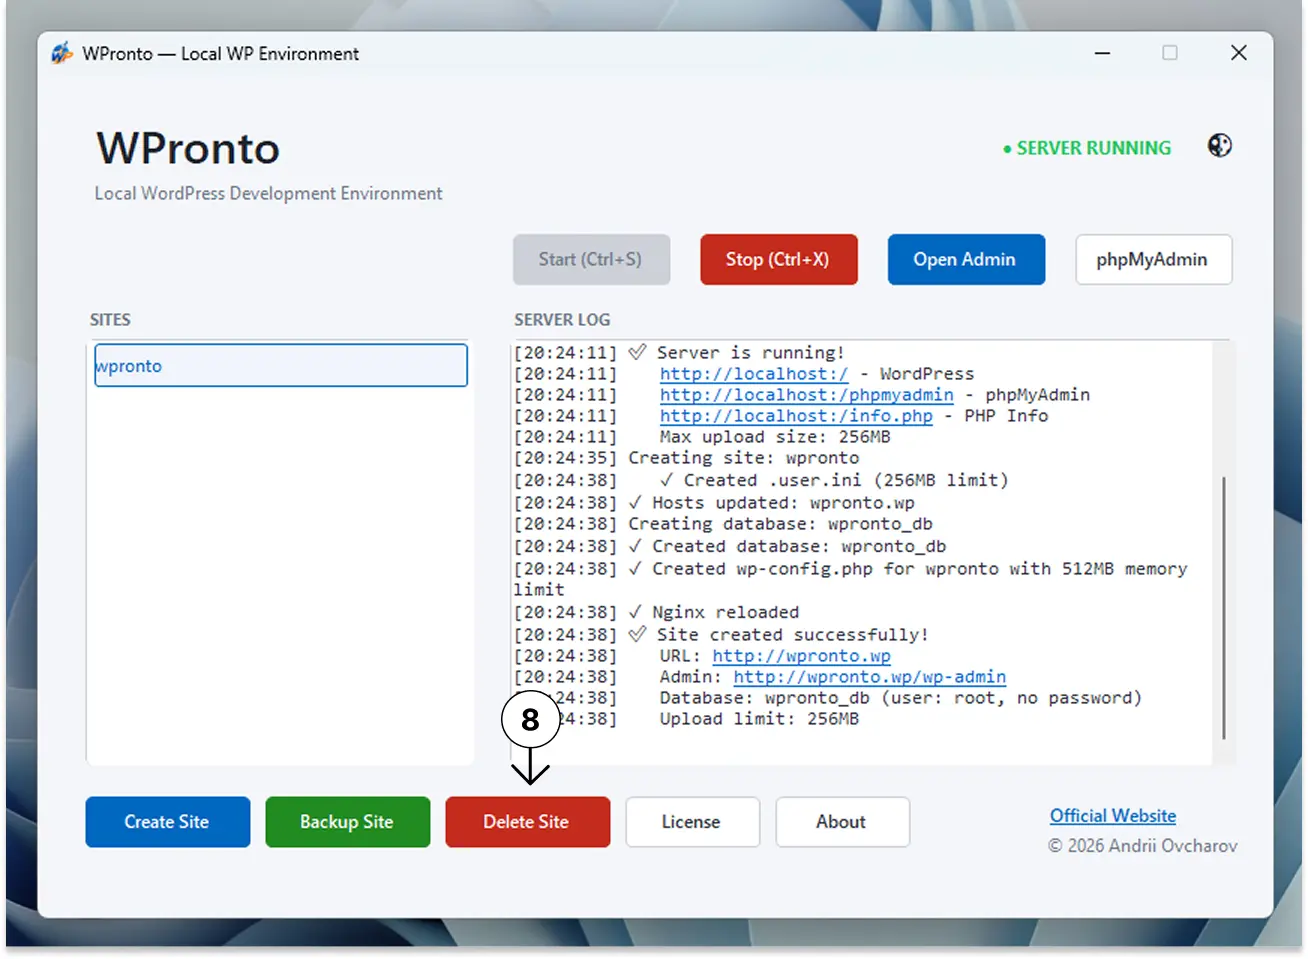
Step 8 — Remove unused projects

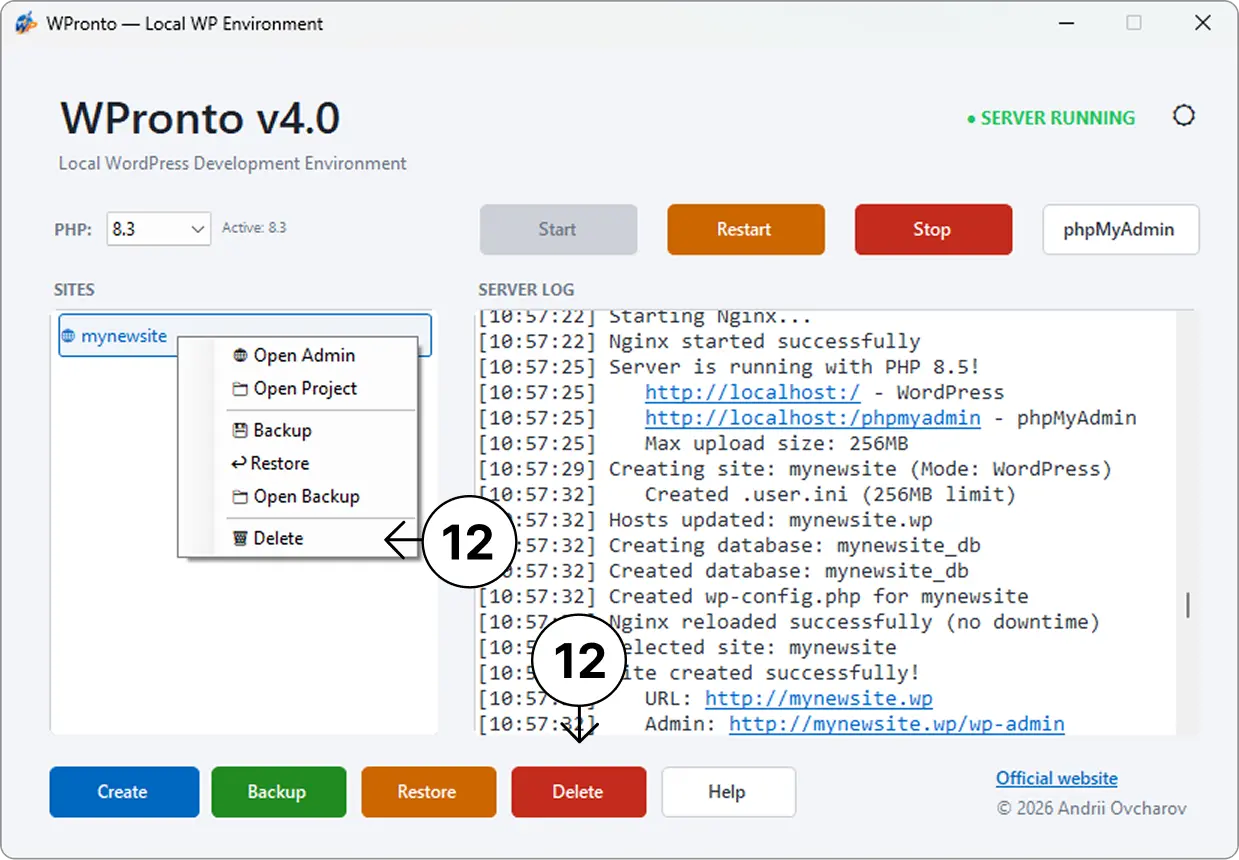
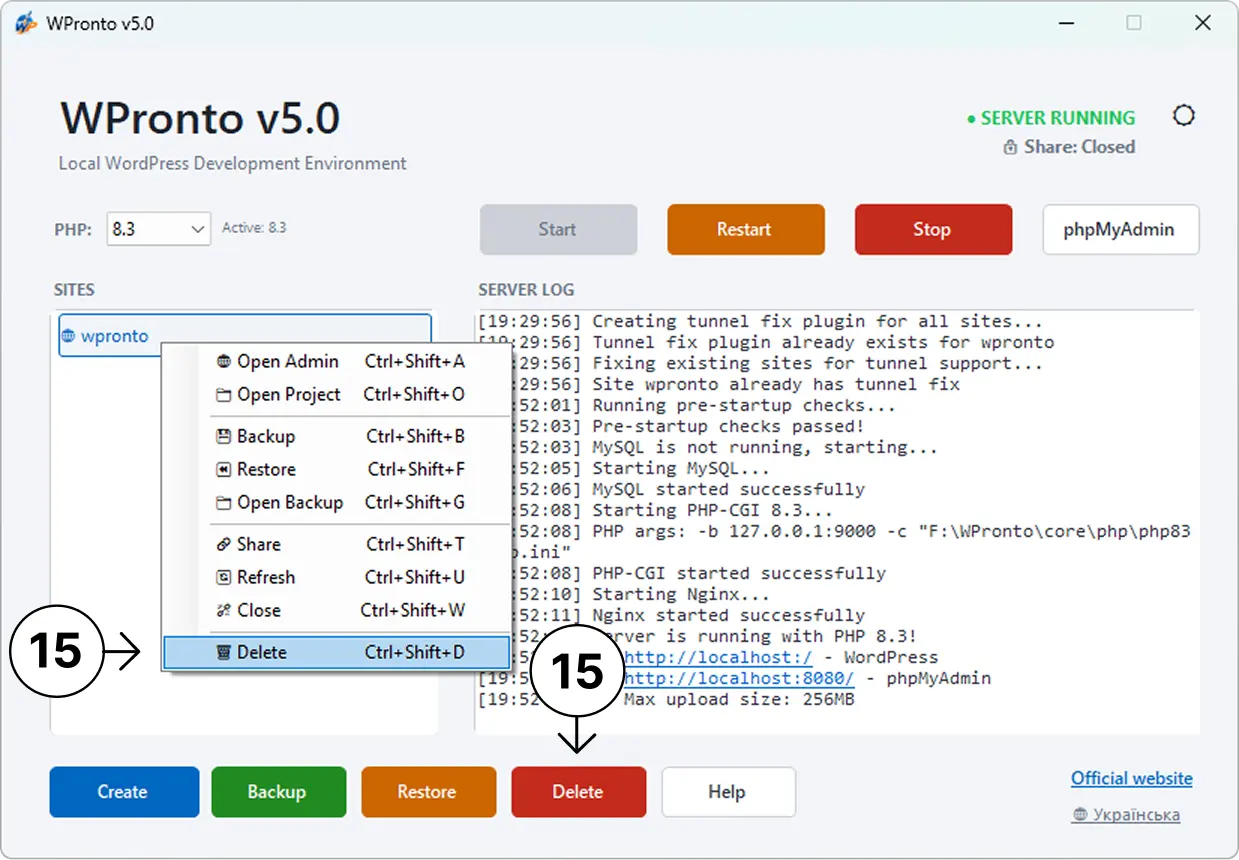
Delete unnecessary projects with a single "Delete Site" button. This removes all files and the database. Please be careful!

Navigation panel

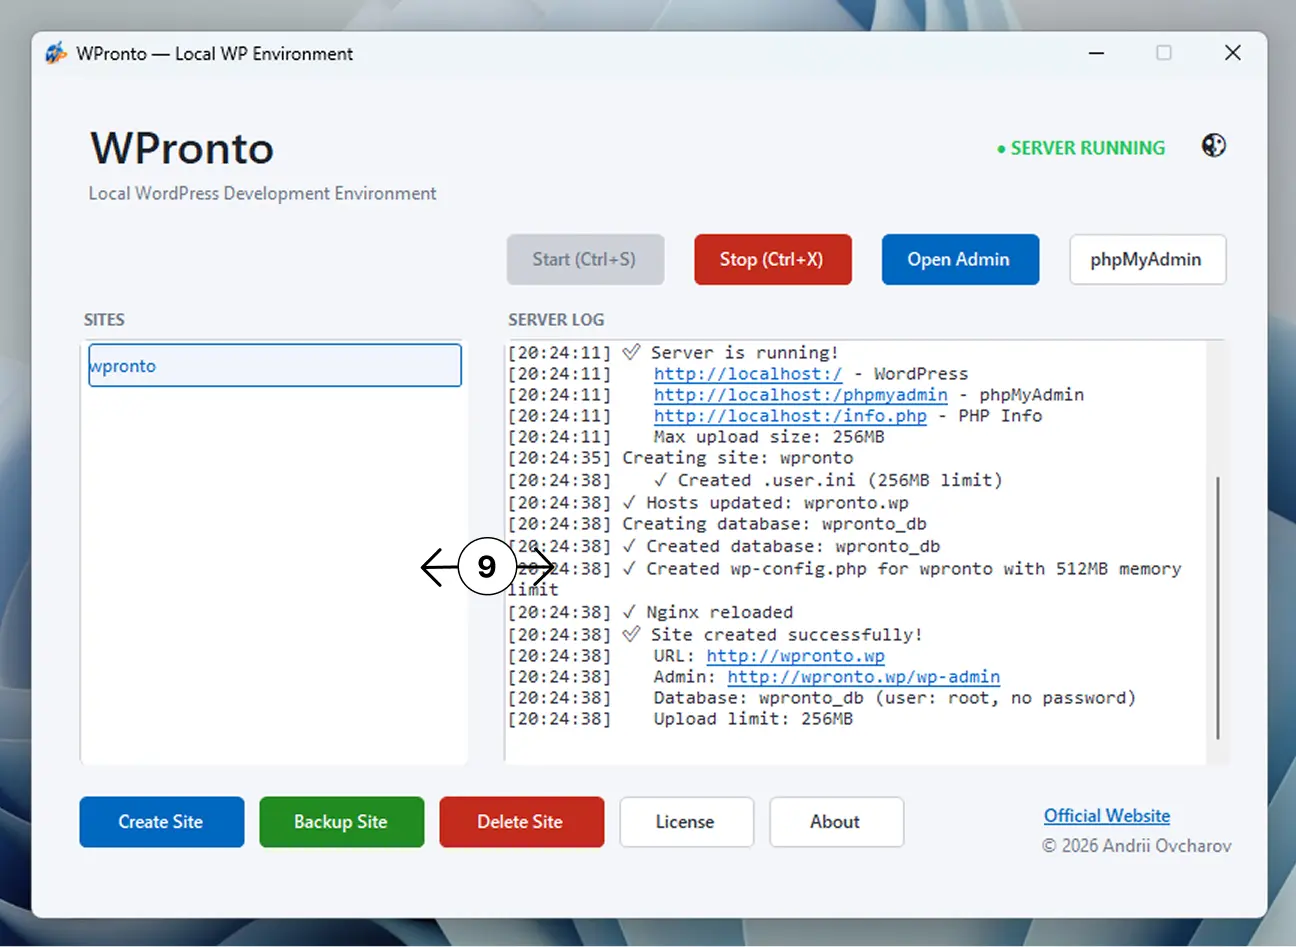
Step 9 — Navigation and control

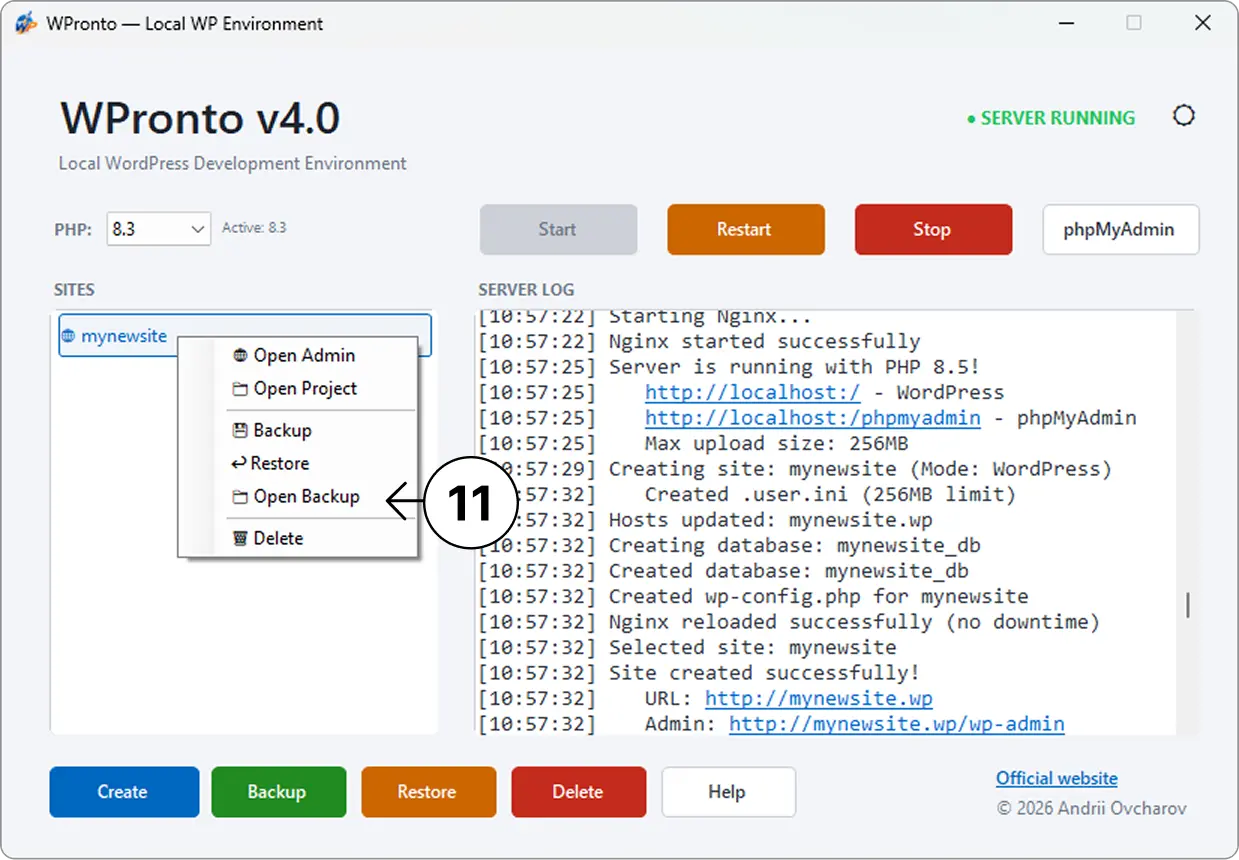
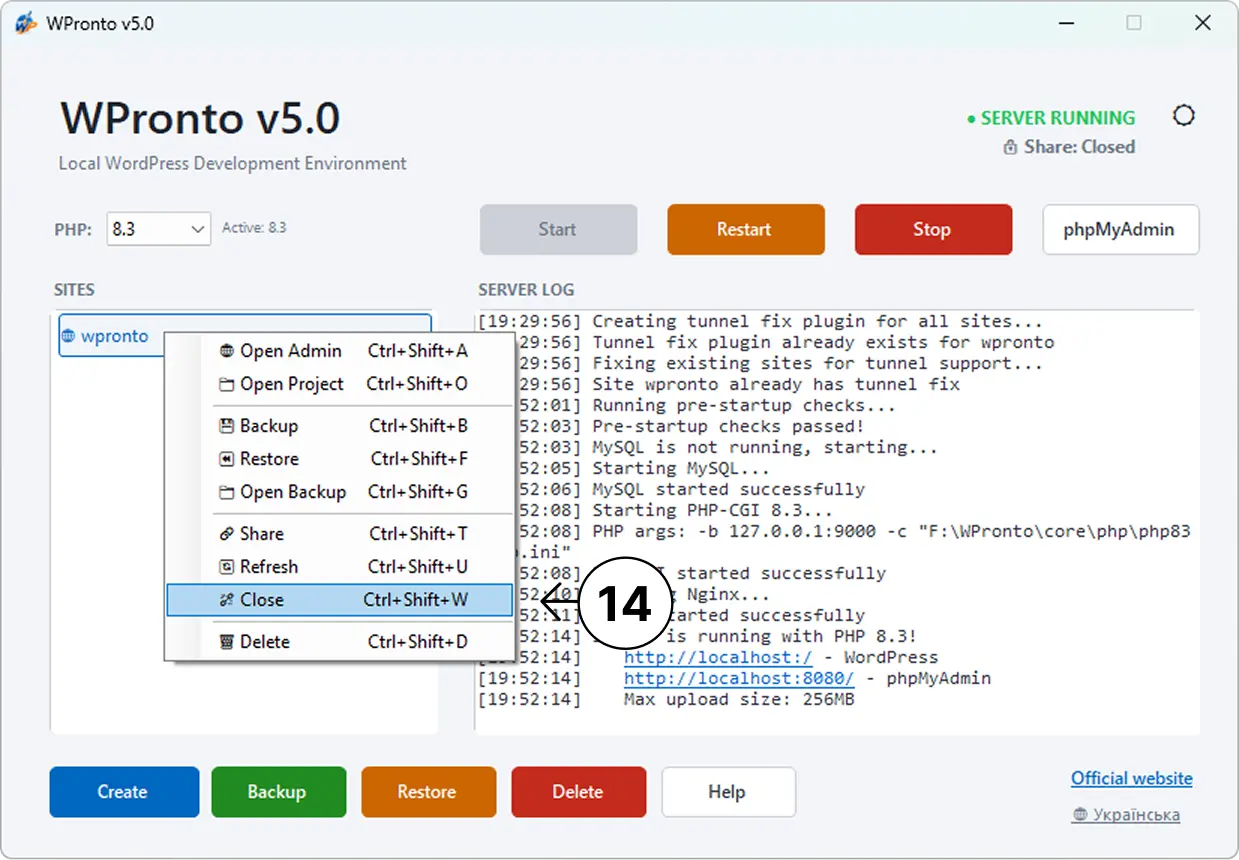
The left panel displays all your projects. Select any project to open its admin, create a backup, or delete it. The right panel shows the server operation log.

About WPronto

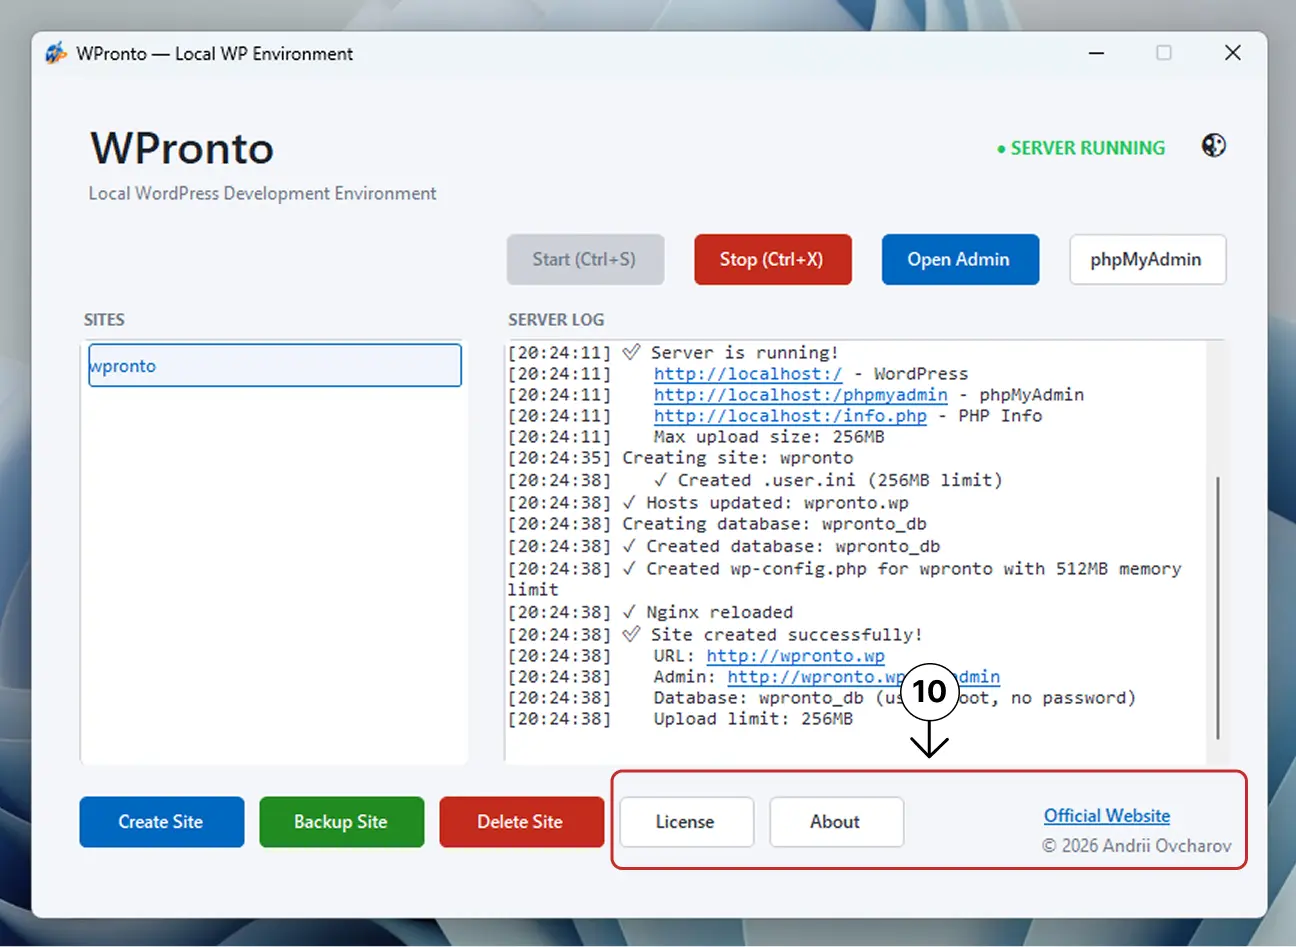
Step 10 — Learn more about WPronto

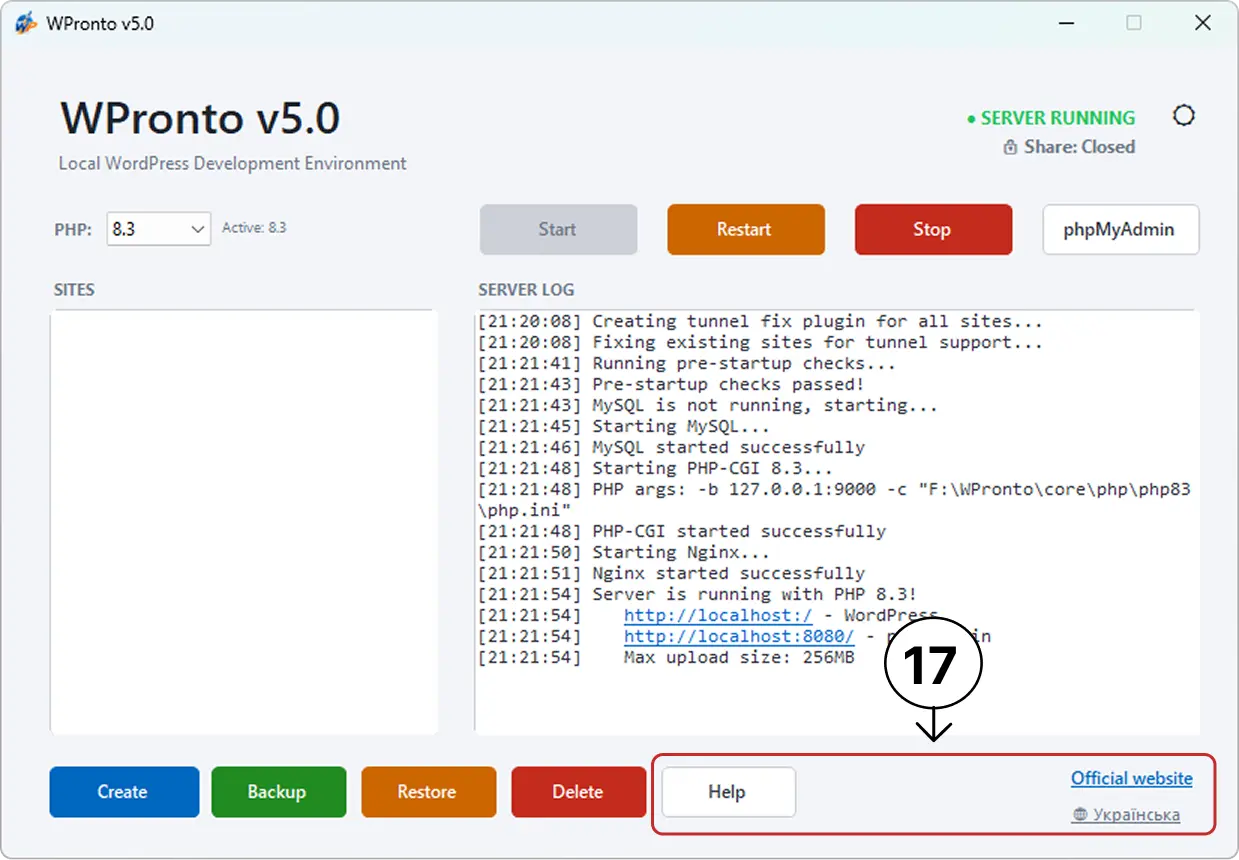
Explore additional information about the project, available tools and software license.

WPronto was designed to stay out of your way. No bloated dashboards. No unnecessary complexity. Just a fast and clean WordPress development workflow.

Quick Guide

How to create a new site?

  1. Click the Start button
  2. Click the Create Site button
  3. Enter the site name
  4. In the WordPress installation window, enter site title, username, and password

After this, the admin panel of your site will open.

How to open an existing site?

  1. Click the Start button
  2. Select the desired site on the left panel
  3. Click the Open Admin button

After this, the admin panel of the selected site will become available.

How to delete a site?

  1. Click the Start button
  2. Select the desired site on the left panel
  3. Click the Delete Site button

After this, all website files and the database will be permanently deleted, except for the backup copies stored in the backup folder.

How to backup a site?

  1. Click the Start button
  2. Select the desired site on the left panel
  3. Click the Backup Site button

After this, a backup folder will be created in the program root, where backup files and databases are stored.

How to restore a site from backup?

  1. Start the server with the Start button
  2. Create a new site with the Create Site button. The site name must exactly match your backup version name
  3. Stop the server with the Stop button
  4. Go to Your_Drive/WPronto/backup/your_project and copy all WordPress files
  5. Go to Your_Drive/WPronto/www/your_project and paste the copied files with replacement
  6. Start the server with the Start button
  7. Go to the database via the phpMyAdmin button and import the database file

After this, your site will be restored from the backup.

How to turn WPronto into a PHP server for testing and learning?

  1. Start the server with the Start button
  2. Create a new site with the Create Site button (e.g., named 'test')
  3. Stop the server with the Stop button
  4. Go to Your_Drive/WPronto/www/test
  5. Delete all files and folders except: index.php
  6. Make changes to the index.php file
  7. Start the server with the Start button
  8. Open the project with the Open Admin button

After this, you can use this folder for any PHP scripts, learning, or testing.

Pro tips

Work in SERVER RUNNING mode. Deleting a site while the server is off leaves the database file behind.
Make backups regularly — this saves time and nerves.
Be careful when deleting — this action is irreversible.
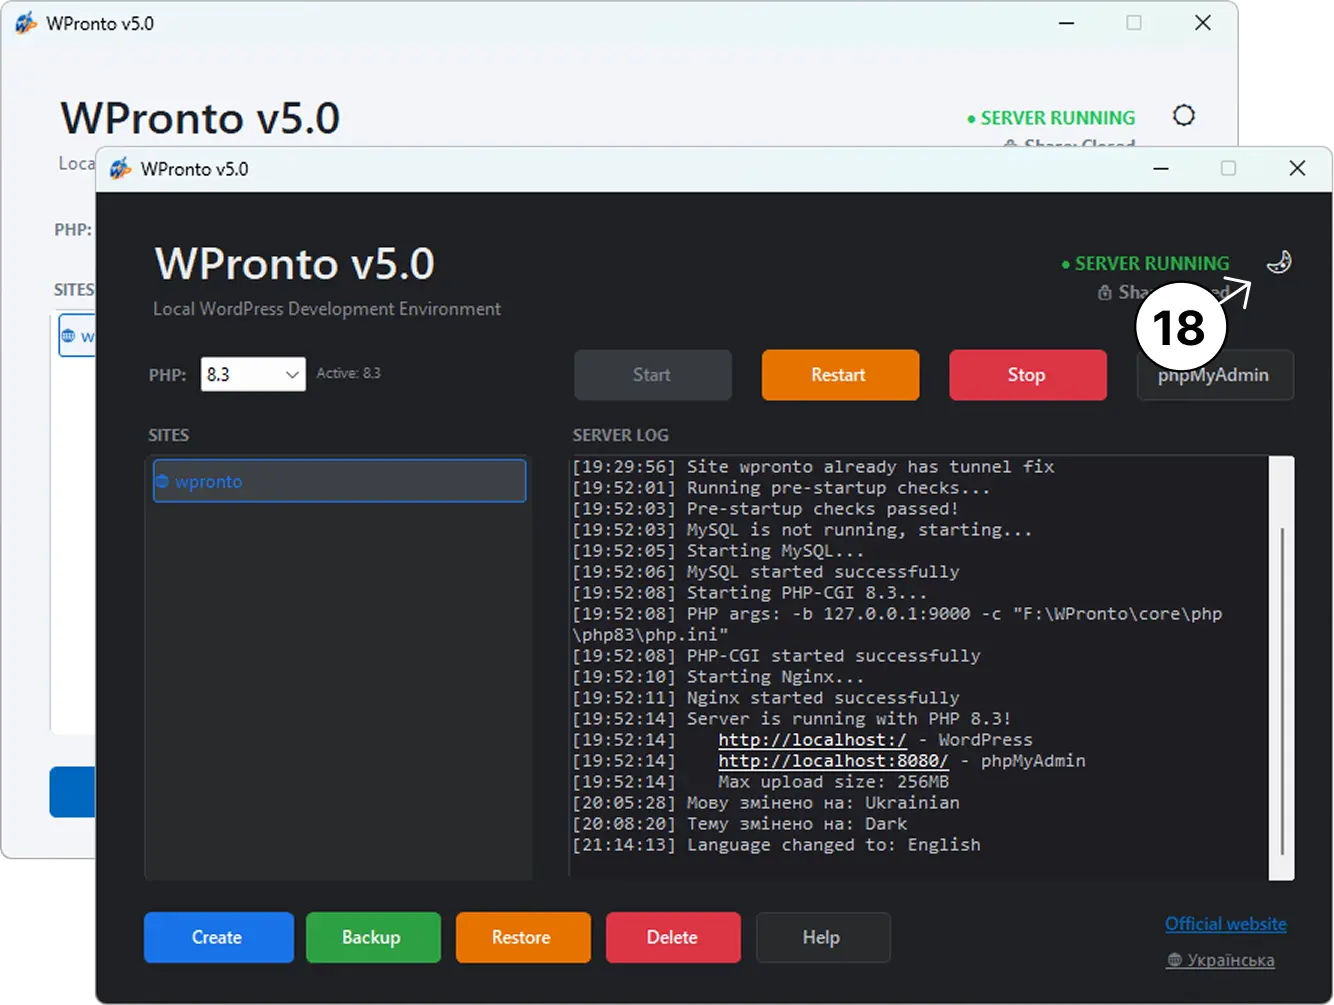
WPronto supports light and dark themes. The toggle is next to the server status. Choose the one that suits you best.
Generate strong passwords for client sites using this password generator.

Common questions

If Windows SmartScreen shows a warning about "Unknown publisher", click More infoRun anyway. WPronto is completely safe.

You can also temporarily disable Smart App Control in Windows Security settings.

WPronto focuses on simplicity, lightweight architecture and WordPress-first workflow instead of overloaded interfaces and complicated configuration panels.

Yes. WPronto is completely free for personal and commercial use. It is distributed under the terms of the MIT License.

WPronto includes Nginx, WordPress, PHP, MariaDB, phpMyAdmin and WP-CLI out of the box.

Replace the files inside the WPronto/core/php folder with a newer PHP version.

Replace the WordPress files inside the WPronto/template directory to use newer WordPress versions for future projects.

All local WordPress projects are stored inside the WPronto/www folder.

Login: root, password: leave the field empty.

WPronto supports file uploads up to 256 MB by default.

By default, WPronto has PHP error display disabled for security reasons, and this is the correct decision. But during development, you can easily enable it by adding the following lines at the beginning of your PHP script:

<?php
ini_set('display_errors', 1);
ini_set('display_startup_errors', 1);
error_reporting(E_ALL);
// Your code here...
?>
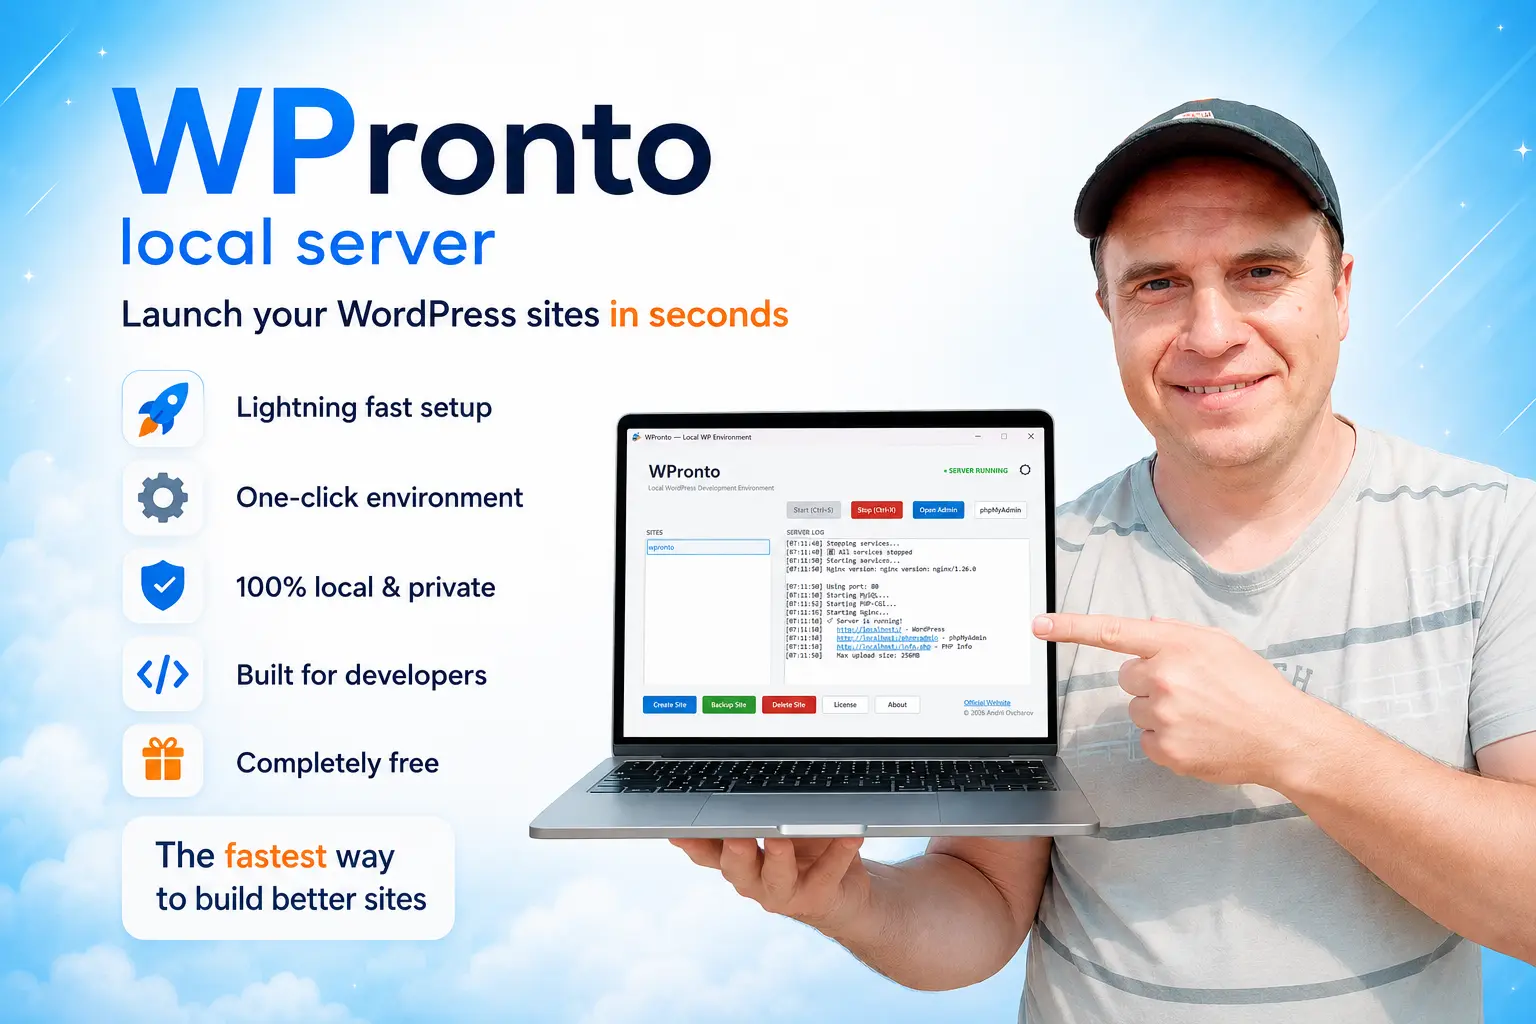
WPronto running on laptop

Ready to launch local WordPress projects in seconds?

Download WPronto for free and start working today. Get a lightweight local development environment designed specifically for WordPress developers.